Basic Geometrical Concepts
In the previous class, we have learned about basic geometrical shapes like triangles, quadrilaterals, circles, etc.
Let's recollect the basics. (Select the blank area to see the answer.)
- The diameter of a circle is
double its radius. Diameter is the longest chord of a circle.- The length of a circle is called its
circumference . - If the radius of a circle is 5cm, then its diameter is
10 cm. - A square has
4 lines of symmetry.
Let's learn more about geometrical shapes.
- Measuring a Line Segment
- To draw a Line Segment of given Length
- Comparing Line Segments using a Divider
- Congruent Line Segments
- Angle
- Measure of an Angle
- Measuring an Angle using Protractor
- Construction of Angles using Protractor
- Bisection of an Angle
Measuring a Line Segment
We can measure a given line segment using a scale. On a normal measuring scale, 1 centimetre is divided into 10 equal portions and each portion is 1 millimetre.
We can say, 1 mm = 0.1 cm.
We can also use a scale to draw any geometrical shape with straight edges like a triangle, rectangle, a square etc.
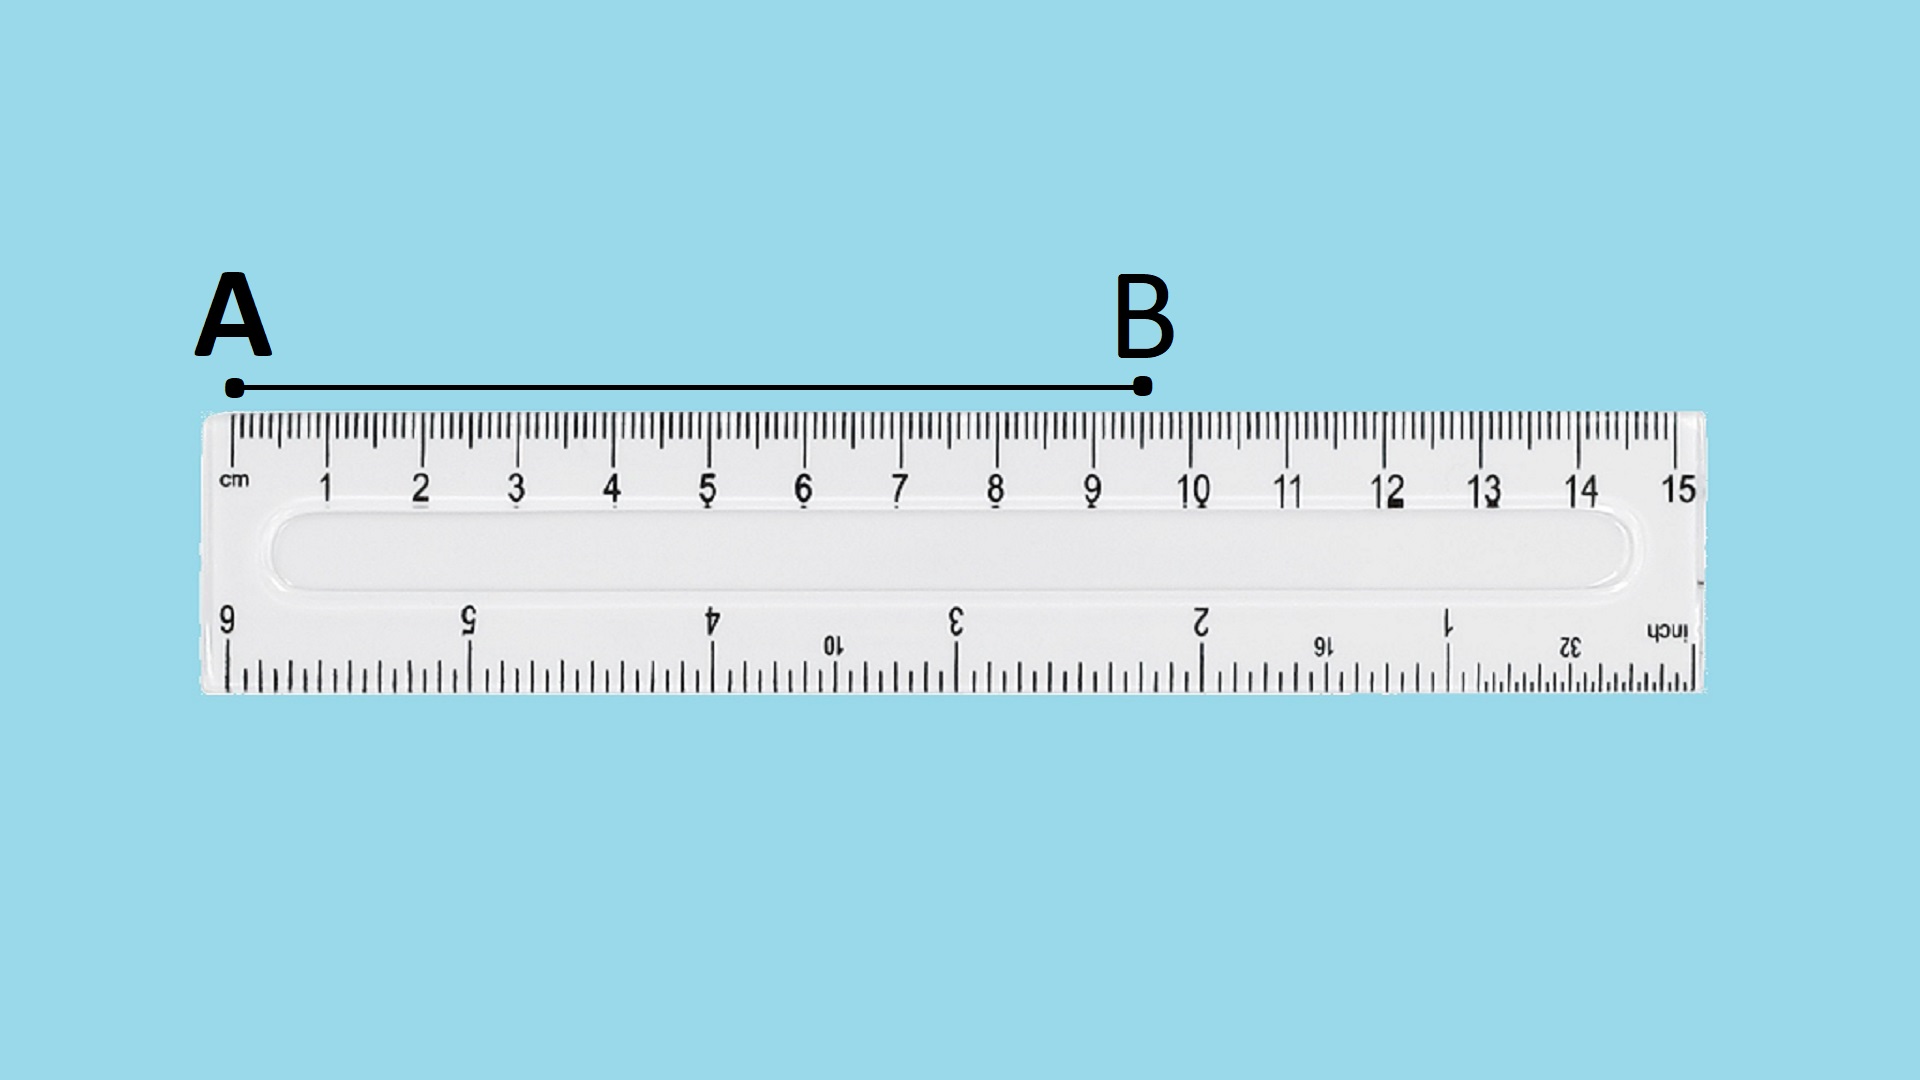
To measure a given line segment AB by using a scale, hold the scale on top of the line segment with zero in the scale on top of point A. Closely monitor the measurement on the scale that is near to point B.
From the below image we can see that the measuring scale accurately telling that the line segment AB is of length 9.5 cm.
Draw a Line Segment of given Length
Let's learn how to draw a line segment of a given length using a measuring scale.
Mark a point on a paper using a pencil and name it as point P.
- Mark a point on a paper using a pencil and name it as point P.
- Keep the pencil in one hand and the measuring scale in the other hand firmly. Make sure that the 0 mark on the scale is on top of point P.
- Identify the mark 8.2 on the scale. 8.2 CM means 8 cm and 2 mm. So it is the second mark after 8 on the scale. Mark this point as Q.
- Now draw a line segment joining the points P and Q without removing the scale.
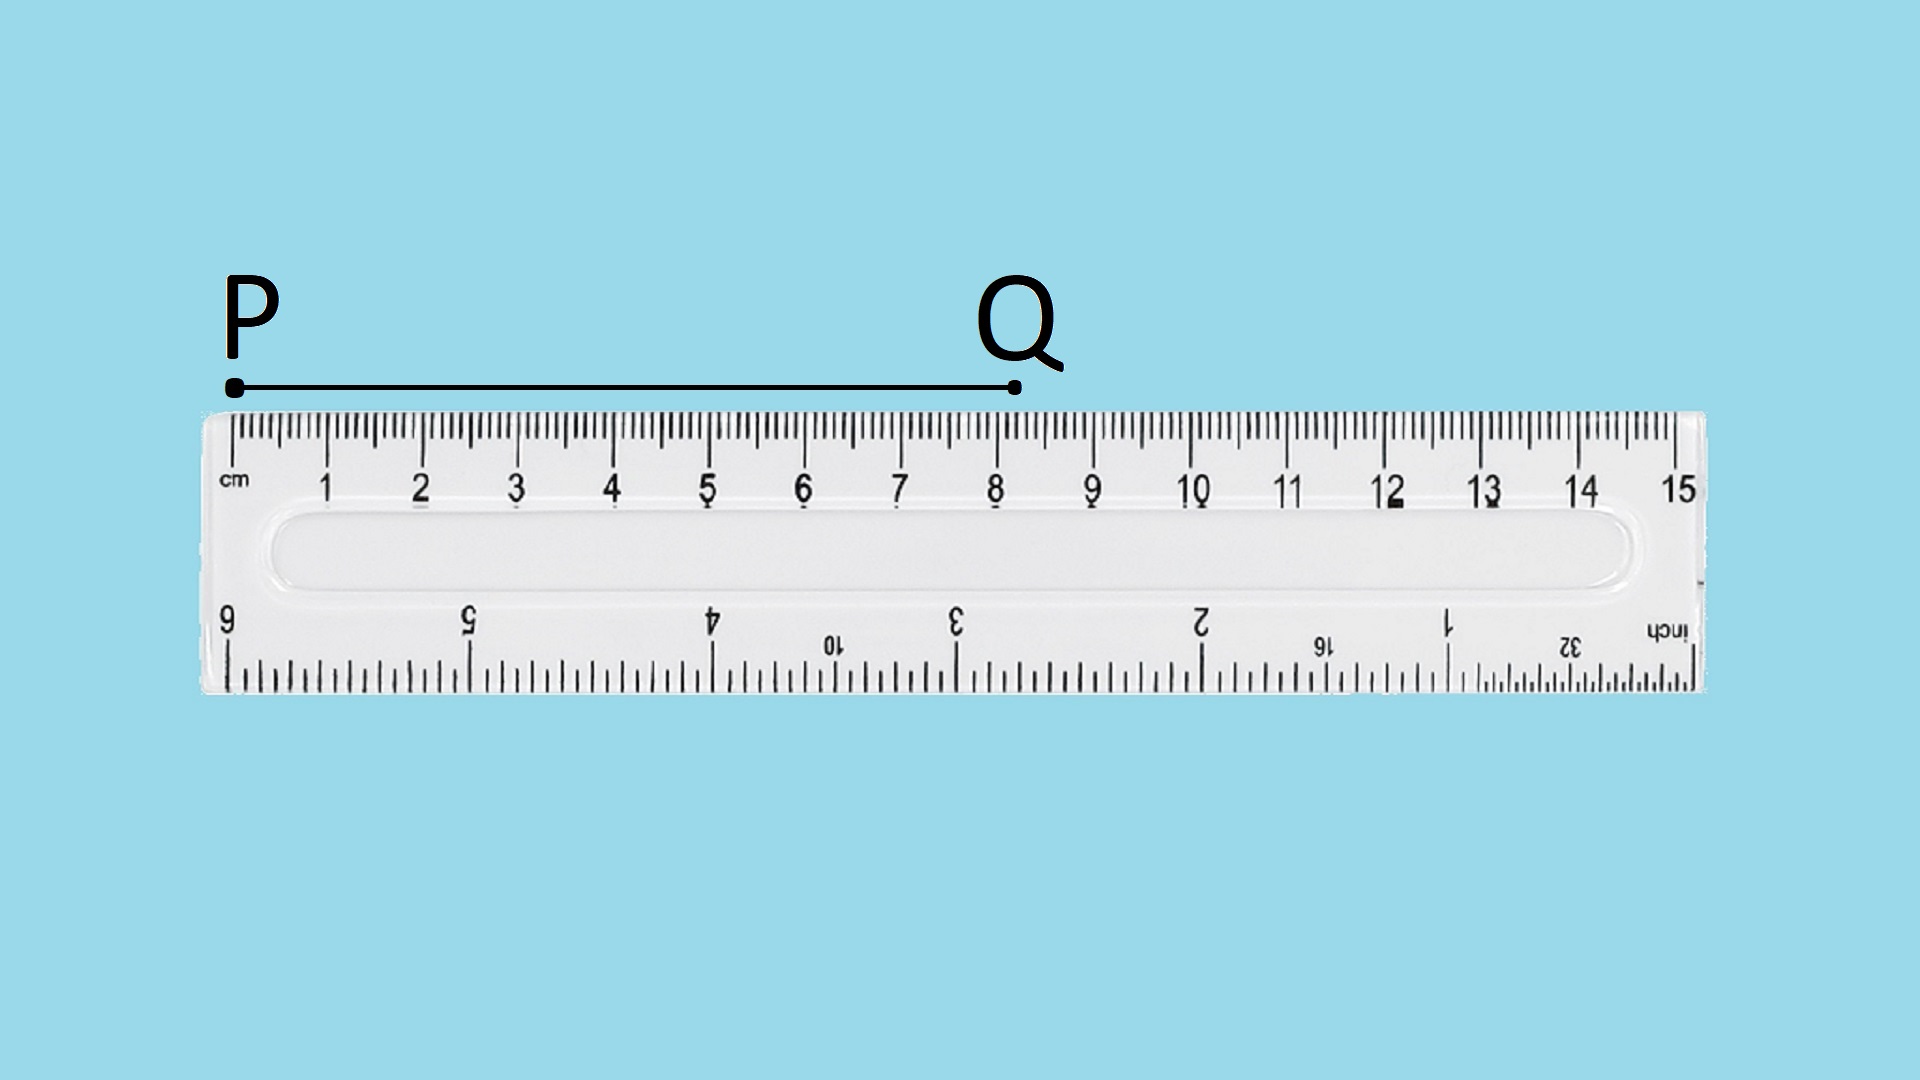
So by using a ruler we can draw line segments of any given length.
Comparing Line Segments using a Divider
We have learnt how to draw a line segment using a ruler and how to measure the length of the line segment using the same ruler. Can we compare the lengths of two line segments without using a ruler? Yes, we can achieve it by using a divider. A divider is an instrument in the geometry box which has two arms with pointed ends the distance between the ends can be adjusted.
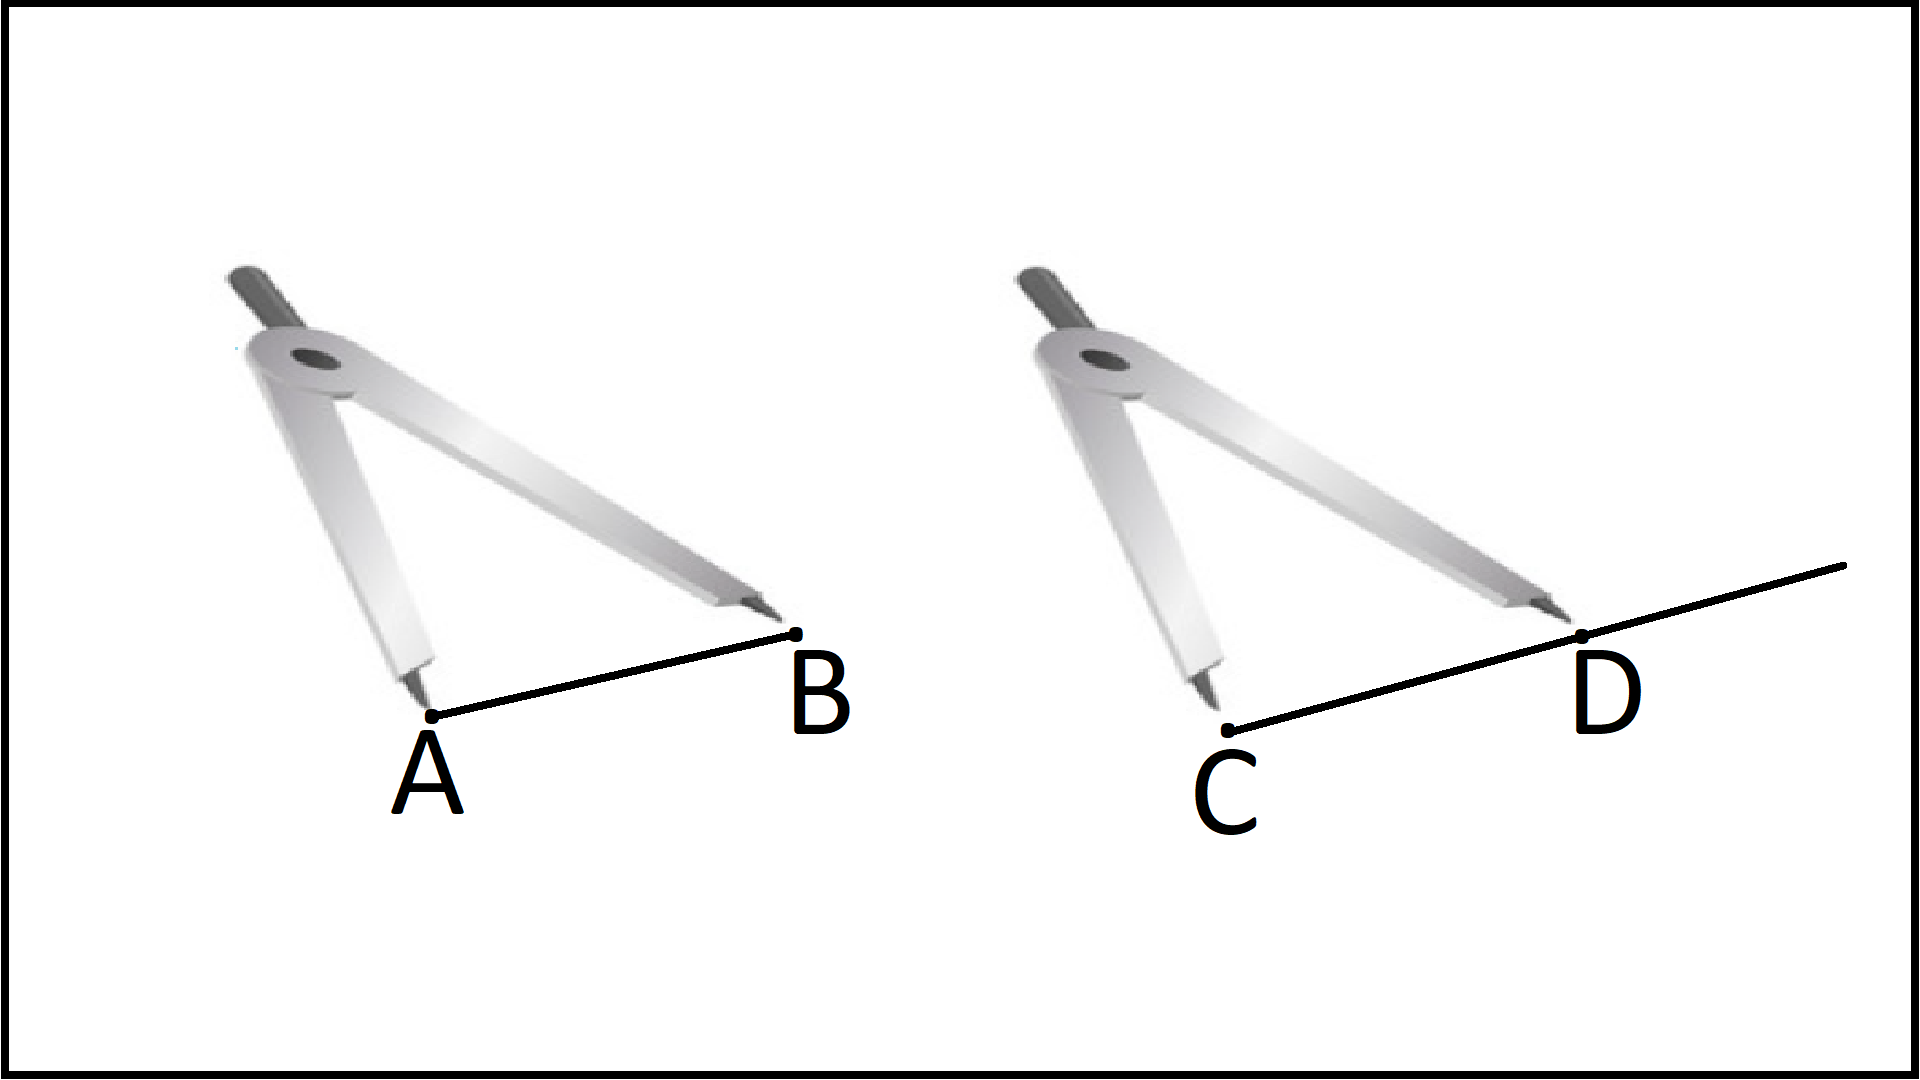
Let's compare line segments AB and CD.
- Open the divider and place its endpoints at A and B of the line segment AB.
- Now lift the divider without disturbing its arms and place one of its ends at point C of the line segment CD and see where its other endpoint falls.
If the other endpoint falls exactly on point D, then we can say the line segments AB and CD are of equal length. If the endpoint is yet to reach point D then we can say the line segment CD is smaller than the line segment AB. If the endpoint already covered point D then we can say the line segment CD is bigger than line segment AB.
In this example line segment AB is smaller than line segment CD.

congruent Line Segments
Two line segments are said to be congruent, if their lengths are equal.
We have already learnt how to compare line segments using a divider. Now it is very easy to draw congruent line segments using a divider.
Here AB is a line segment of some length. In order to draw a congruent line segment, draw another line segment that is longer than AB and mark a point C on this new line segment.
- Using the divider identify the length of the line segment AB.
- Lift the divider carefully without disturbing the positions of the legs. Place it's one endpoint at C and mark the point where its other end Falls as D.
We got the line segment CD which is congruent to line segment AB.
Angle
Two rays having a common endpoint form an angle. Here you can see angles of different measurements are being created by different rays. A ray is a part of a line that has one endpoint. The other end is extending endlessly.
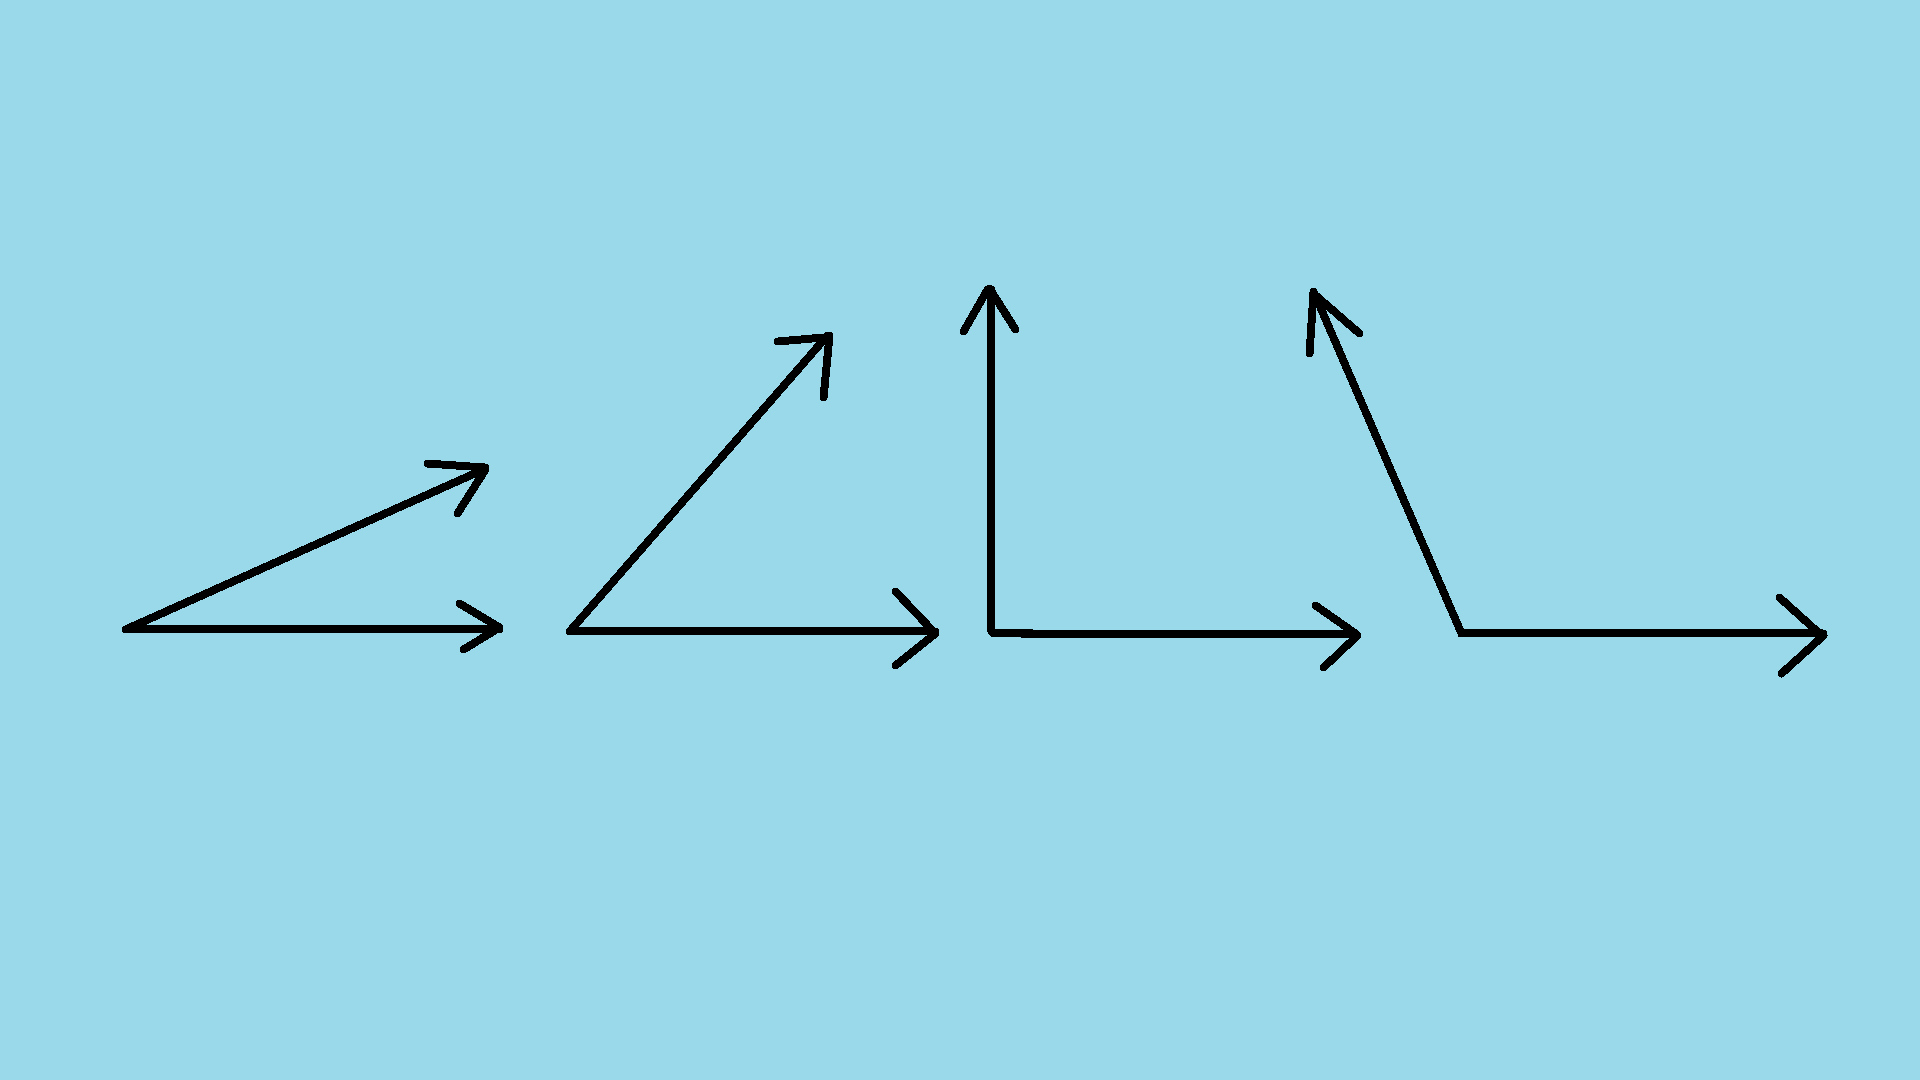
The angle created by the rays AB and AC is denoted as ∠BAC or ∠CAB. While denoting an angle the common endpoint should always come in the middle.
Measure of an Angle
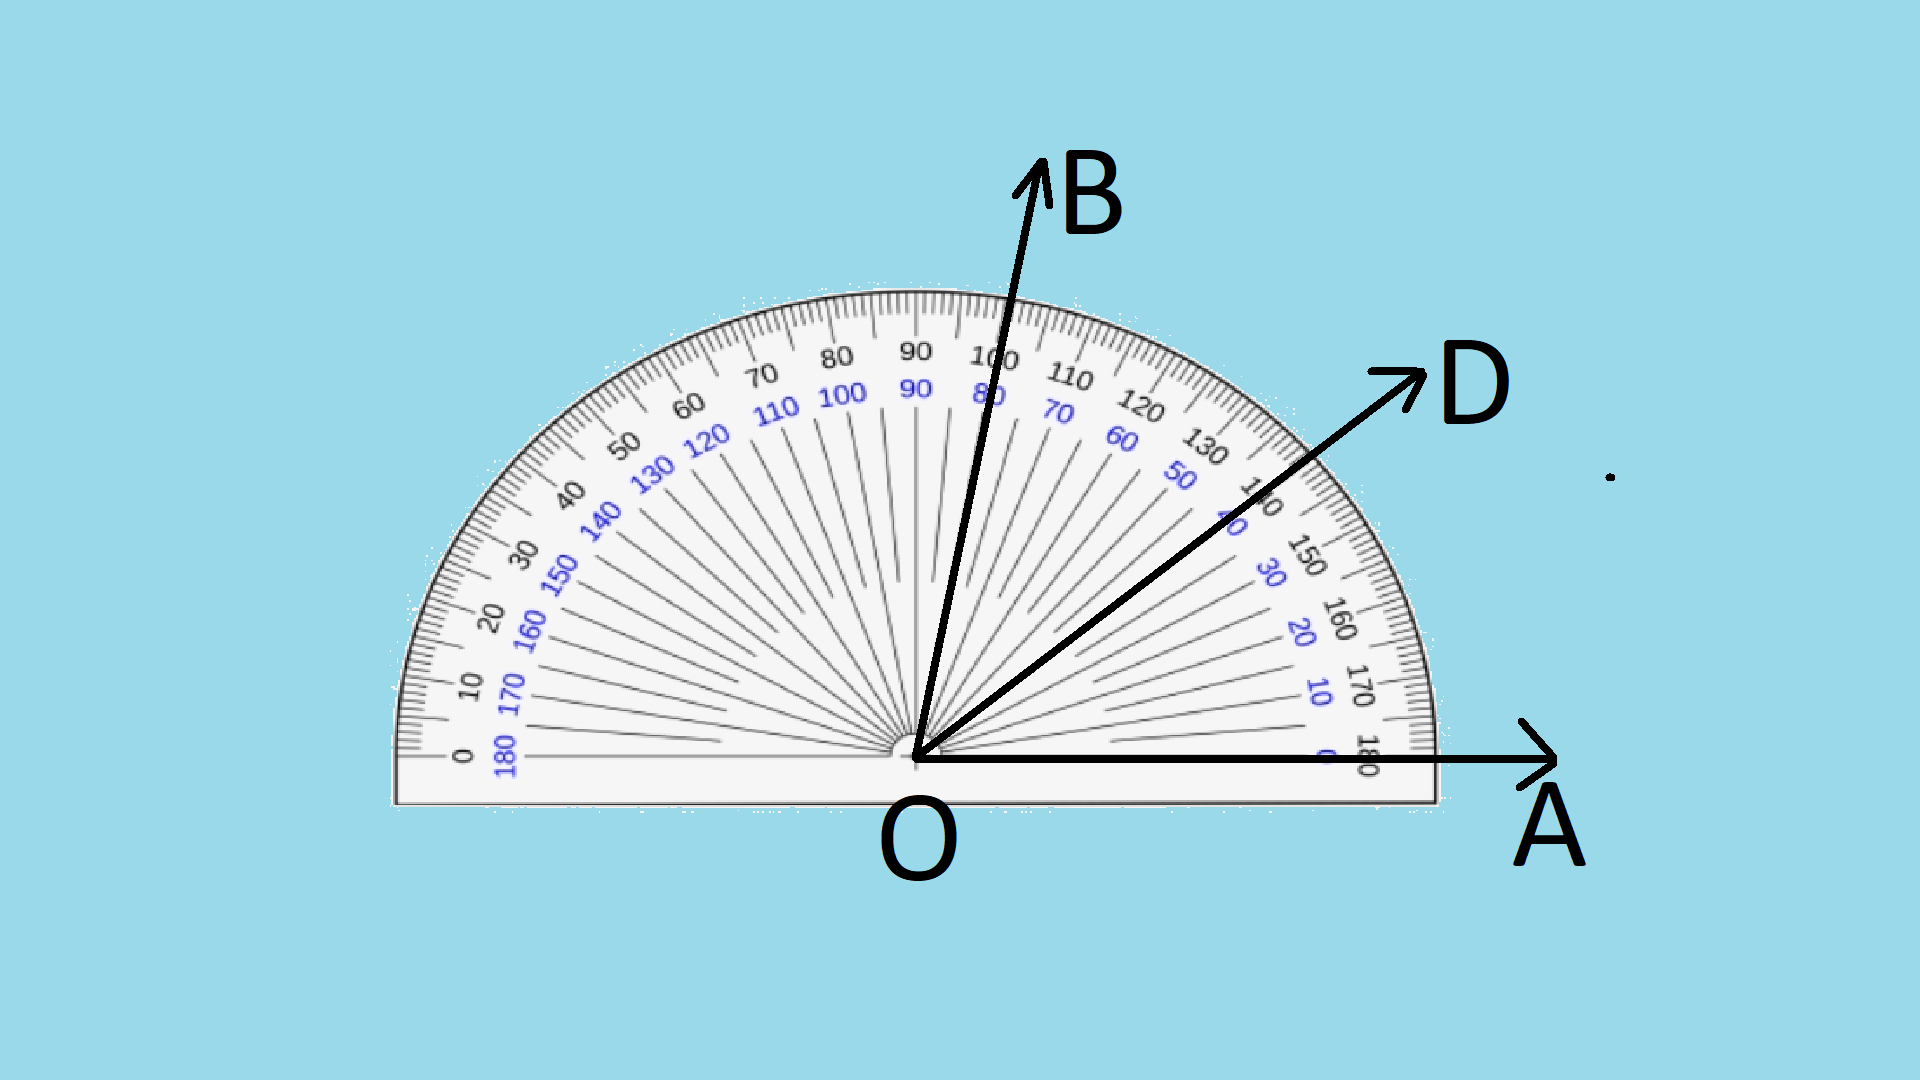
Do you know how exactly an angle is being formed? When the ray OA is rotating some distance either clockwise or anticlockwise about the point O and stop along with the ray OB, then we will get an angle in between OA and OB.
We can say that angle BOA (∠BOA) is formed by the rotation of OA up to OB.
We measure angles in degrees. A complete turn around a point is divided into 360 equal parts each of these parts measures 1 Degree. 1 degree is written as 1°.
We measure angles by an instrument called the protractor.
Measuring Angles using Protractor
Lets's learn how to measure an angle using a protractor.
We learned the angle around a point is 360 degrees. in a protractor, we can see angles up to 180 degrees are marked.
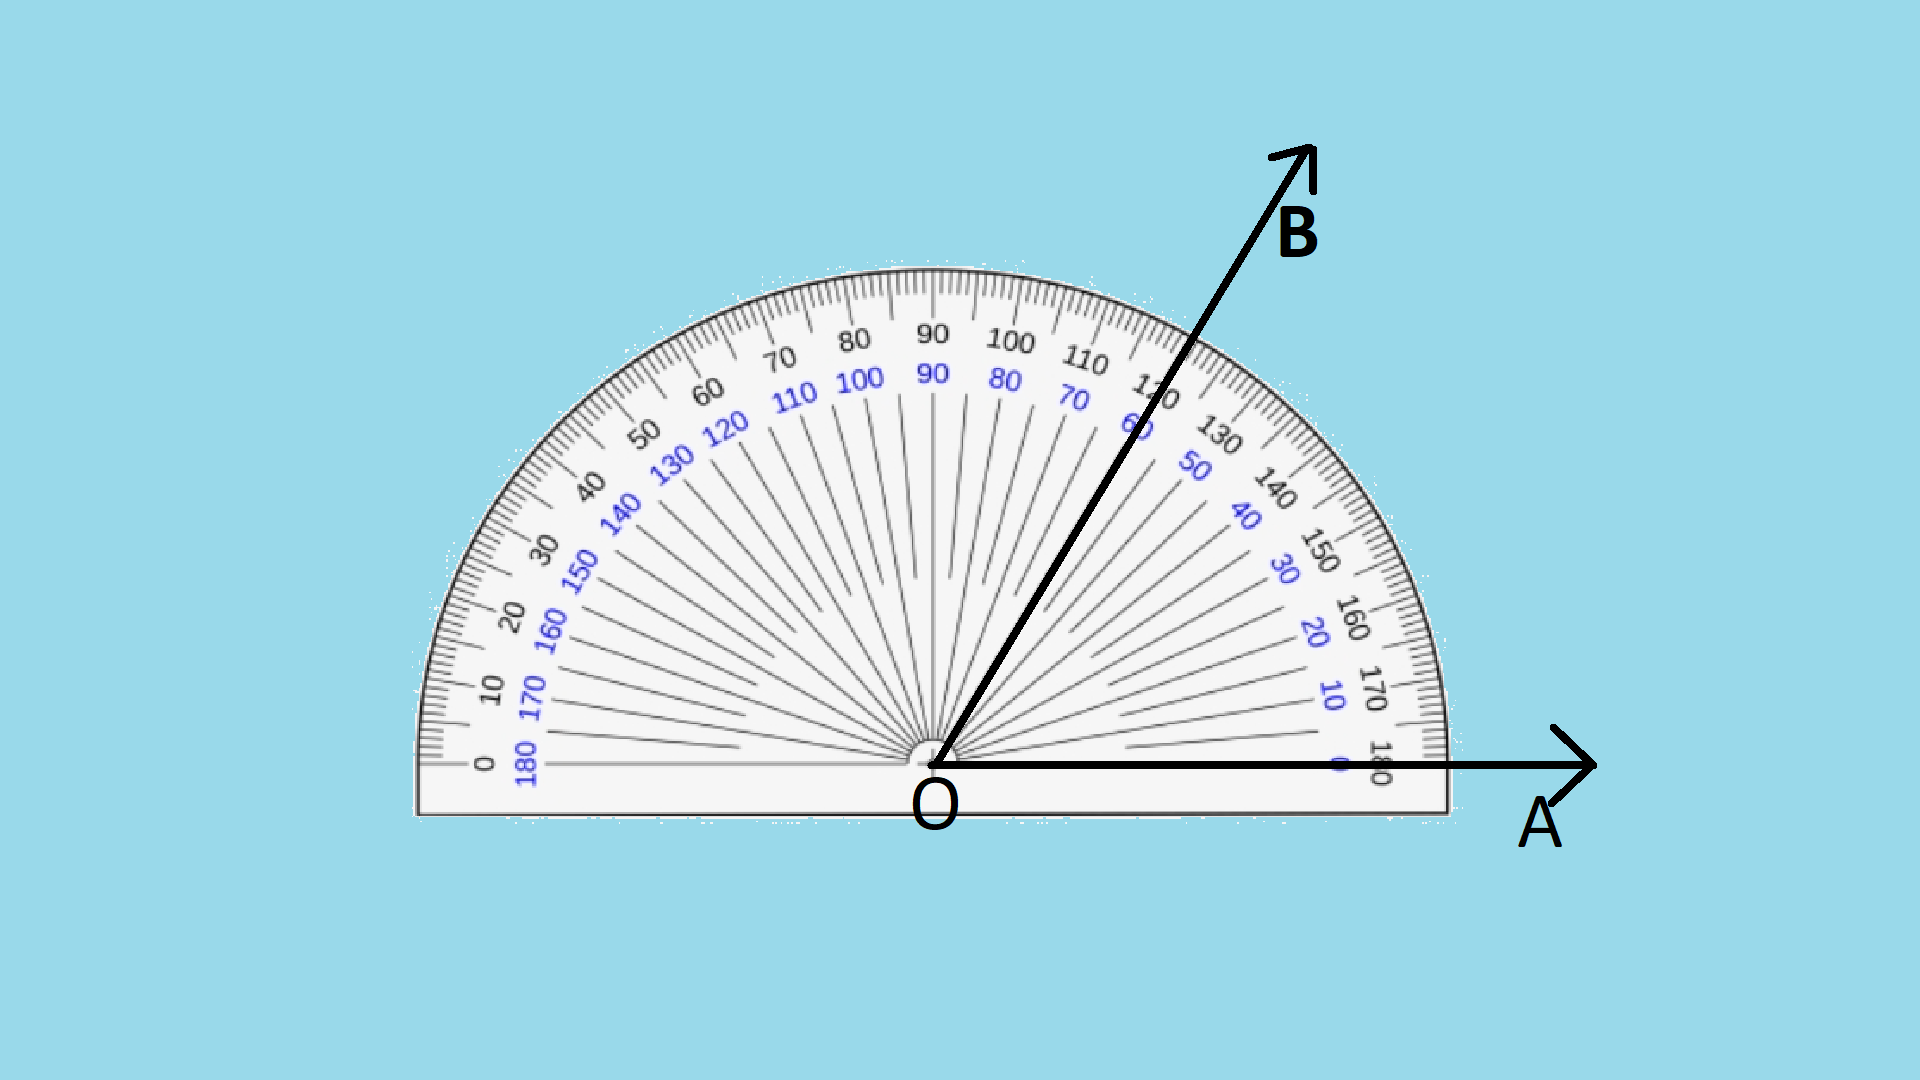
Let's measure the angle BOA.
- Place the protractor on top of the image so that the base line on the protractor fall along with OA and the center of the protector falls on top of point O.
- You can see that the mark zero is still on the ray OA. Identify the number that is marked on the protractor that falls on top of the ray OB.
This number is the angle between rays OA and OB.
Construction of Angles using Protractor
We have learnt how to measure an angle with the help of the protractor. Let's learn how to draw an angle of a given measure. We will use the protractor and the ruler for this activity.
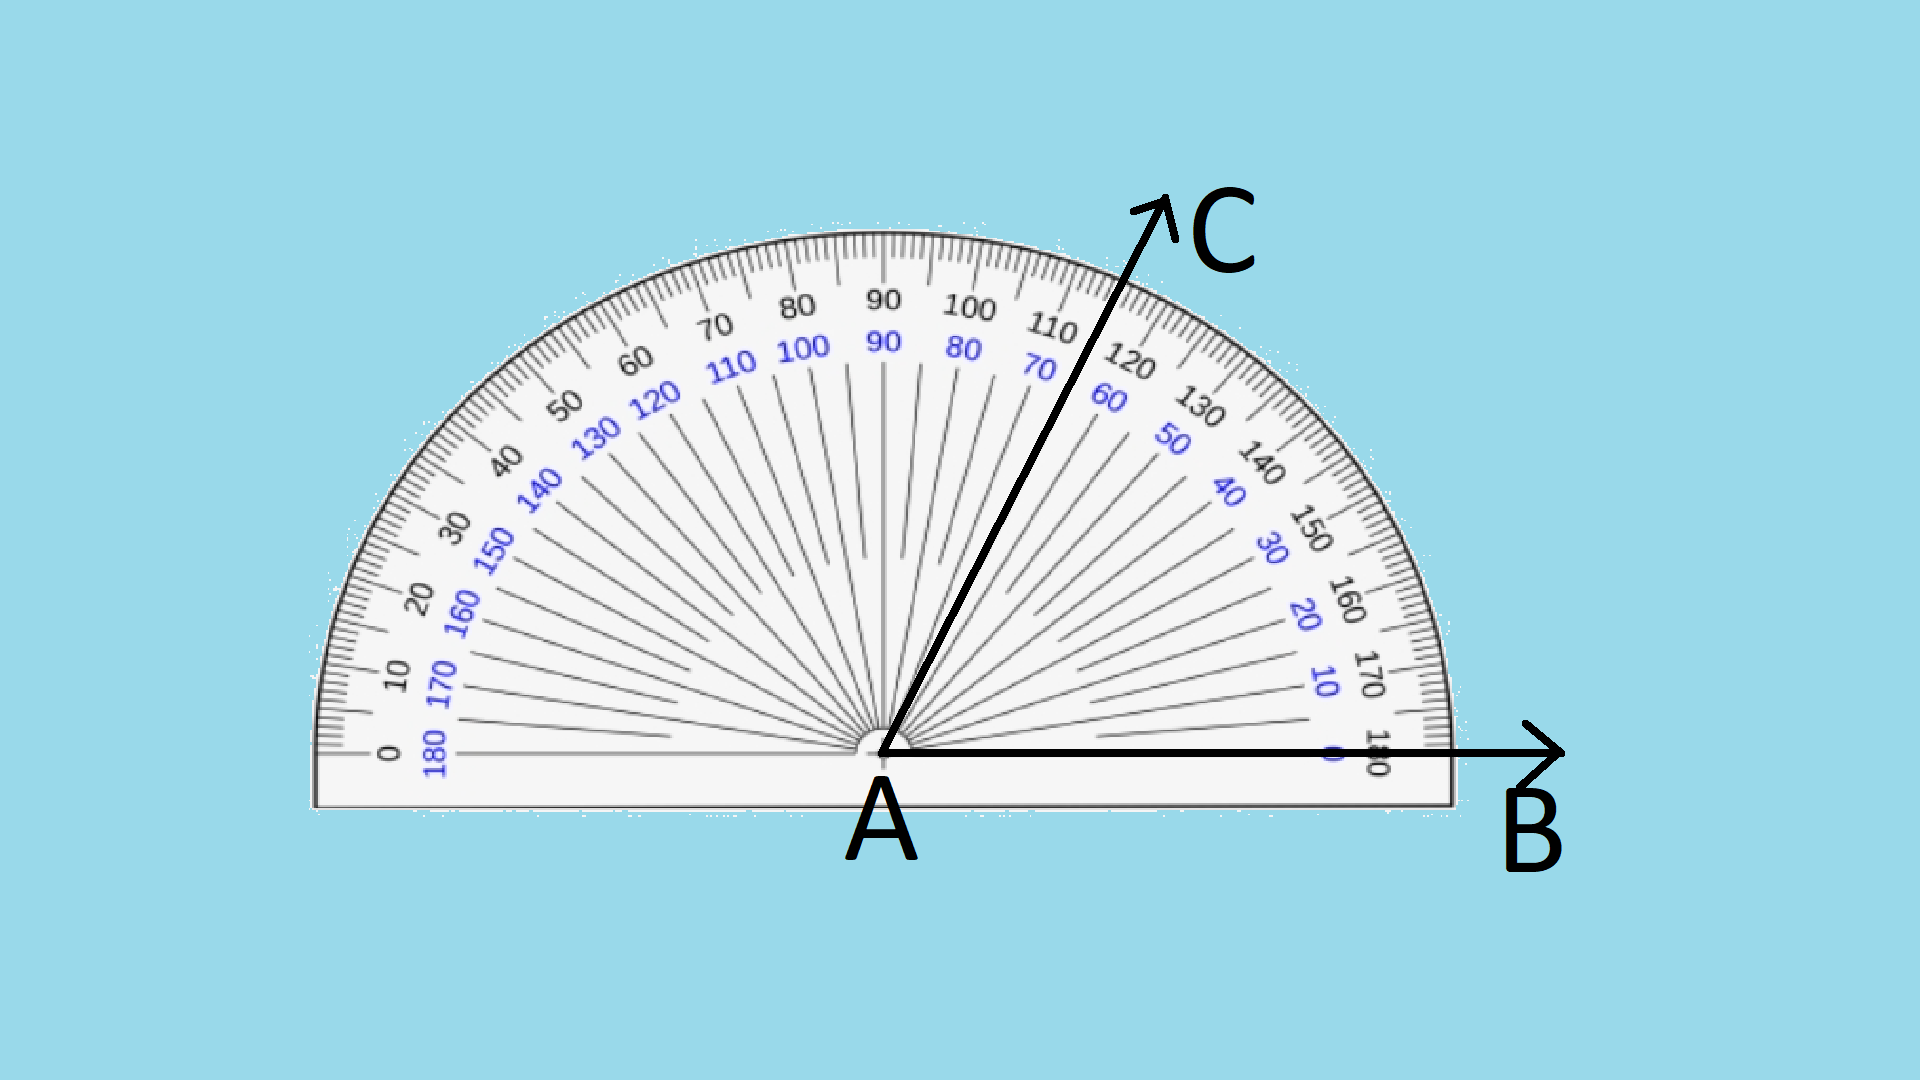
Let's draw an angle of 65 degrees.
- Draw a ray AB.
- Place the protractor over AB such that the base of the protractor coincides with AB and the centre of the base coincides with point A.
- Start from 0 degrees on the right side of the protractor and read the inner scale, till we reach the mark 65. 65° is exactly the middle of the markings 60 and 70. Mark this point as C.
- Now lift off the protractor, join the points A and C with the help of the ruler.
We got ∠CAB that is equal to 65 degrees.
Bisection of an angle
bisecting means dividing equally into two pieces. An angle can be bisected in two different ways.
By paper folding
This method is the easiest method and use it only for understanding. Draw an angle ∠BOA on a paper. To bisect it, just fold the paper through the point O so that the rays OA coincides with OB. Just unfold the paper and draw a ray OD through the folding mark.
We just bisected of ∠AOB. The ray OD is called the bisector of the angle.
By using protractor
Let's try to bisect the same ∠AOB with a protractor
- Place the protector on the angle so that the midpoint of its base line falls on the point and baseline falls alone OA
- Note the measure of the angle along OB
- Calculate the half of this measure
- Identify the marking on the protractor where this half measure is marked.
- Mark the point D on the Halfway
- Now remove the protractor and join the points O and D
- Draw a ray that joins O and D
we just bisected the ∠AOB
